Track Real Time on Page for Bounces and Exits with GTM
The Time on Page metric is probably one of the most misunderstood metrics in Google Analytics. Google Analytics measures the time on page for each page, but can only do so by measuring the elapsed time between two interactions. The first interaction is the timestamp of the initial pageview, and the second interaction is usually the timestamp for the next pageview (or an event). So for sessions with just one pageview (i.e. bounces) there’s just one timestamp. In those cases, Google Analytics is unable to measure the time on page. As such, for the time spent on a page for bouncing sessions and on exit pages there’s simply no data. (there’s no ‘last’ timestamp on exit pages either). The real time on page is therefore likely higher than what your reports are telling you.
This is - in my opinion - a fundamental problem. Not in Analytics as such, but because the metric can be misleading if you don’t know the background. Favourite Googler Justin Cutroni has an excellent post on how Analytics calculates time metrics. Not all Google Analytics users are aware of this. So some people might make flawed decisions based on the time on page as reported in GA. Content heavy websites such as blogs, news sites, forums and more will often receive many single page visits.
For example, chances are that you got here through a Google search on this particular topic. And you’re probably not going to read any other posts on this site. So you might read this post, and then leave the site. You’re bouncing, and Google Analytics will tell me that you spent 0 (zero!) seconds on this page. Or, actually it won’t tell me anything at all. I’ll only be able to measure your time on (this) page if you trigger an event by following an outbound link or navigate to another page on the site.
Remember, as with many of my posts, this one is for inspiration. Don’t just implement it blindly, but think carefully about what you need to measure and why. And then decide if you should use the approach in this post, combine it with other ideas or rewrite it completely.
Why should you care?
Some types of websites, such as blogs, will often have a large share of sessions that bounce. Not necessarily because such sites are uninformative, but rather the opposite. A typical pattern is that people search for very specific topics, arrive at a site, get the answer and leave again.
So in those cases, a high bounce rate is nothing to worry about. But due to the nature of how Google Analytics (don’t) track time on page for bounces, you need another way to measure which pages are the “good ones”. I.e. which pages are actually read. Now, generic scroll tracking will do some of the job. But since most scroll tracking plugins simply measure the scroll distance - e.g. to the bottom of the page - and do that just once, they don’t take into account that some people might scroll to the bottom to scan the page, then to the top again to begin reading.
The concept described in this post takes care of that. And will enable you to make better decisions about e.g. what type of posts to write more of.
Real Time on Page
The Real Time on Page should also measure the time spent by all those users who exit the site from any given page. To do so, the basic approach is simply to fire a hit to Google Analytics right before people are leaving a page. This is accomplished by using a combination of an event listener and a few tags, triggers and variables in Google Tag Manager:
- Get the first timestamp (i.e. start the stop watch) when a pageview is initiated
- Get the second and last timestamp when user is leaving the page, calculate the difference to get the real time on page and send it to GTM
- Relay the real time on page to Analytics using a User Timing tag
#1 Get the first timestamp
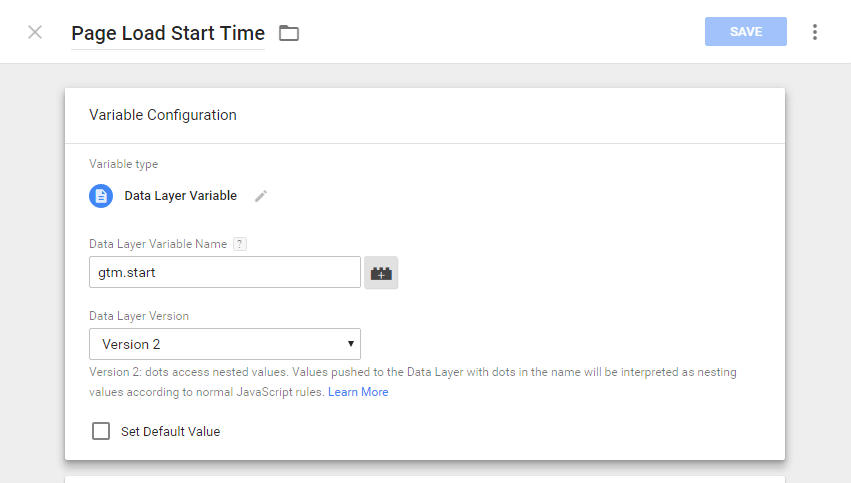
This one is easy, since it’s almost provided automatically in GTM. The only thing needed is to create a variable to capture the timestamp so it can used in a tag. So go ahead and create a new variable of the type Data Layer Variable and set the Data Layer Variable Name to gtm.start. Name the variable “Page Load Start Time”:
#2 Calculate the real time on page
Next up, we need a tag to calculate the real time on page and push that value to Google Tag Manager. For this, we will create a Custom HTML tag that:
- Calculates the real time on page
- Pushes that information to the dataLayer
- And does it when the user is leaving the page
So create a new Custom HTML tag, name it “HTML - beforeunload, and enter the javascript code as shown:

**Important: **Set this tag to trigger on either All Pages or on those pages you’d like to measure the real time on page on. The script adds an event listener to the page, telling GTM to execute this script at the moment where the user leaves the page. As you can see from the code, the timeOnPage variable calculates the difference between the time of the event and the time for the initial pageview.
#3 Relay the real time on page to Google Analytics
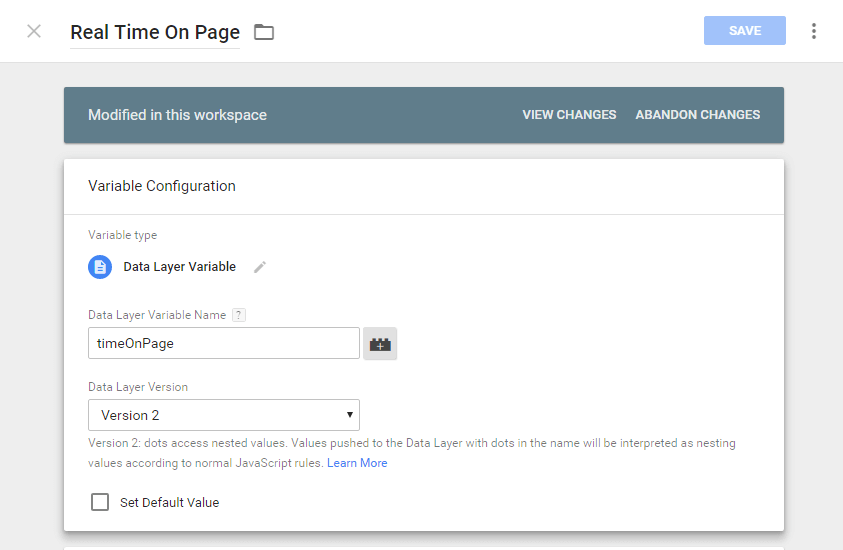
Before the information can be sent to Google Analytics, it’s necessary to capture the real time on page from the dataLayer. It’s also necessay to setup the actual tag. Start by creating a new variable of the type Data Layer Variable, set the Data Layer Variable Name to timeOnPage, and name the variable “Real Time on page”:
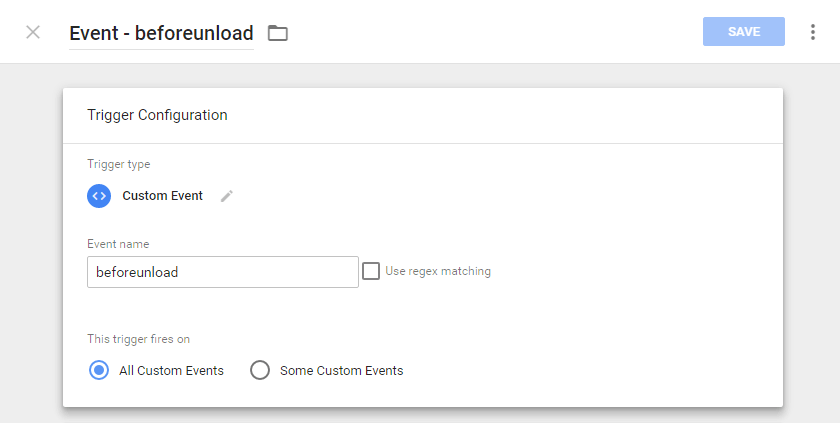
Save the variable and proceed to create a new trigger of the type Custom Event. Name the trigger “Event - beforeunload” and set the Event name to beforeunload:
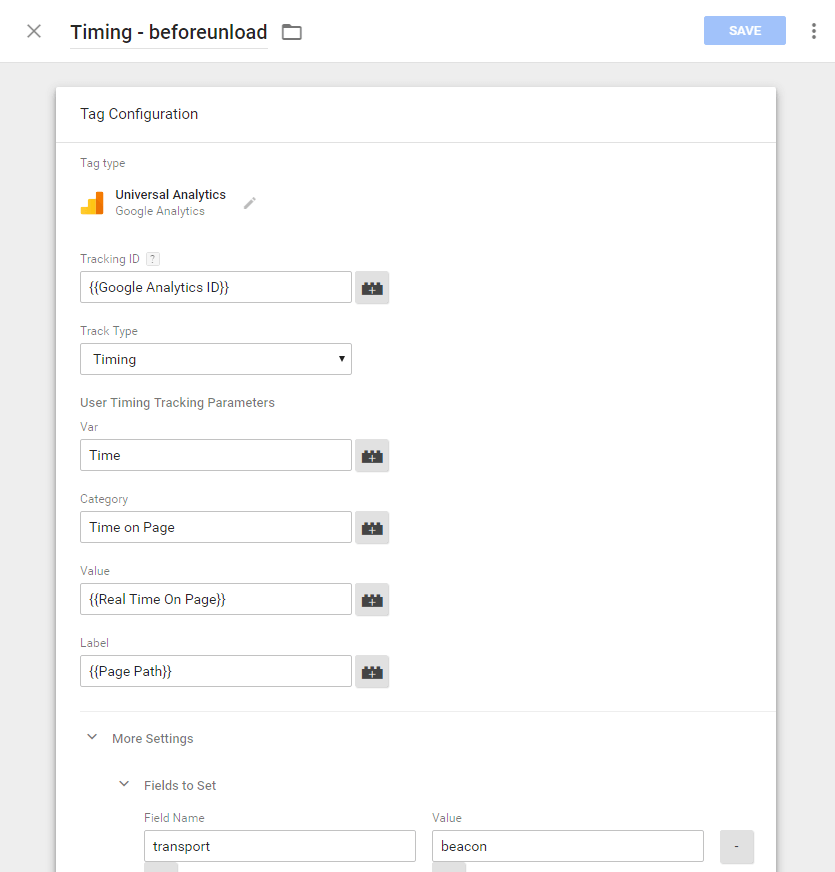
Lastly, create a new Universal Analytics tag, name it “Timing - beforeunload” and enter your tracking ID (I usually store the tracking ID in a separate variable). Then set the Track type to Timing. Next, set the Category to “Time on Page”, the Var to “Time”, the Value to {{Real Time On Page}}. This refers to the variable we created earlier. Set the Label to {{Page Path}} (assuming you have already enabled this built-in variable - if not, just do so). **Important: **Go to More settings and Fields to Set, and add a field as shown on the screenshot. The Field Name must be set to transport, and the value to beacon. This ensures that the Google Analytics hit is sent as a POST request instead of the usual GET request. This is necessary to avoid the usual GET request getting cut by the browser when it’s leaving the page:
When configuring the trigger for this tag, set it to the Event - beforeunload trigger, we created earlier. Then save the tag, and you’re good to go. Preview your container and use the GA Debugger to verify that data is sent correctly when leaving pages.
Lay back and enjoy better reports
And that’s it. You’ll now be able to view the actual time on page on your different pages. Just open the User Timings report under Behavior » Site Speed in the Google Analytics interface! Or install this custom report. The Site Speed report will look something like this:

Notice how some pages here have exceptionally long timings? Take the first for one example. The average user timing in seconds for that post is 10,600 seconds - or roughly three hours. I know for a fact that it won’t take three hours to read that post. But often, people will open pages in background tabs in their browser - and it may take a while before they actually start reading. To avoid counting the seconds where a page might not even be visible, you’d use the Page Visibility API that’s available in most modern browsers. There’s a nice (and similar) post on this topic over at Analytics Ninja. Another caveat is that the default session timeout in Google Analytics is just 30 minutes. So if a user starts reading a page, leaves it open for more than 30 minutes and then exits the page, we’re sending a hit to Analytics after the session expired. This will start a new session, but this time without a pageview (since the only hit in that last session is). So you will see too many sessions in Analytics.
Avoid the extra session
So to avoid that extra, last, empty session, we can do a couple of things:
- Keep the session alive for as long as the page is open
- Don’t send user timing hits if the time exceeds the session timeout
(1) could be accomplished by continously pinging Google Analytics with a non-interaction event or a user timing hit as long as the page is open - say every minute. Just remember that all sessions are always reset and “auto” timed out at midnight.
(2) would - in my opinion - be the better choice. I’d say I’m more interested in people who actually read the posts. I can live with not measuring people who opened a page and kind of forgot it. And this is simply solved by adding a condition to our “Event - beforeunload” trigger:
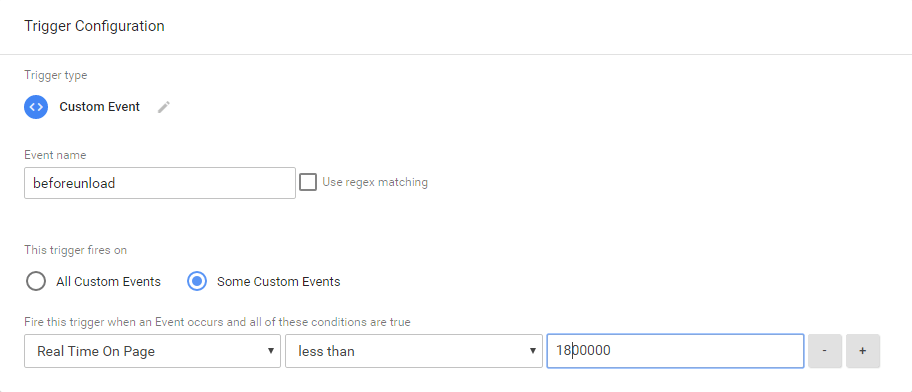
So in this case, the trigger is only valid if our Real Time On Page value is less than 1,800,000 milliseconds. Which is 1,800 seconds, which is 30 minutes, which is the session timeout. Of course, you could also adjust your default session timeout to a couple of hours and adjust the value in the trigger accordingly. In any case, this concept will enable you do to much more precise measurements of the real time on page. Also for those sessions that are not normally tracked with time metrics (bounces, exits). Happy measuring!